Create separate assignments

Note: This content is no longer updated. For the latest content, please go to the user guide for M-Files Online. For information on the supported product versions, refer to our lifecycle policy.

You can also have separate assignments created once the object workflow is moved to a certain state. To create such assignments, enable Create separate assignments and click Add... on the Actions tab of the State Properties dialog.

If you want the workflow state to be automatically changed after the completion of the separate assignment(s), you need to define that in the Trigger options of the state transition.

Adding and Removing users

You can manage the persons responsible for completing the task by using the Add... and Remove buttons in both the Assign to User dialog and the Create separate assignment dialog. In addition to adding users via the Users or user groups list, you can add users based on metadata or a state transition. For example, a person who has been specified in the property Approved by in the object's metadata can automatically be specified as the person to whom the task is assigned. For more information, see Permissions under Workflow State Transition Permissions and Pseudo-users.


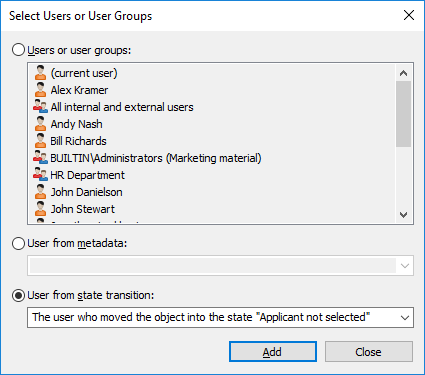
Selecting a user based on an earlier state transition.

Monitoring

In the Monitoring section (Actions > Create separate assignments > Monitoring), you can define the users that you want to notify each time a task has been completed. The assignment submitter is automatically defined as a task monitor.

There are separate icons for uncompleted and completed assignment objects, making it easy to distinguish between uncompleted and completed assignments.

Assignment class

The assignment class determines the assignment type and assignment completion conditions. See Assignment Class for more information.

Assignment description

Add a free-form description of the task. The assignment notice by email displays the description to the person to whom the task was assigned. Notification templates supported by M-Files can also be included in the description. For more information on notification templates and placeholders, refer to Editing Notification Settings in M-Files Admin.

Deadline

If desired, you can specify a deadline for the assignment. An automatic reminder is sent if the assignment has not been marked complete when the deadline is approaching. The reminder will be sent using a common notification rule which can be deleted by the administrator.

Tip: The deadline can also be useful for creating views. You can create a view to display any assignments with an approaching deadline. For more information about views, refer to Creating a View.

Creating a Workflow State with a Separate Assignment

  1. Open M-Files Admin.
  2. In the left-side tree view, expand a connection to M-Files server.
  3. Expand Document Vaults.
  4. Expand a vault.
  5. Select Workflows.
  6. Select a workflow that you want to edit from the Workflows list.
    Result:The workflow is opened in the graphical workflow designer.
  7. In the graphical workflow designer, right-click a workflow state to which you want to add a separate assignment and select Edit.
    Result:The State Properties dialog is opened.
  8. In the Actions tab, check the Create separate assignments check box and click the Add... button.
    Result:The Create Separate Assignment dialog is opened.
  9. Click Add... to add the user or users the separate assignment is assigned to.
  10. Optional: Click Monitoring... to add a user or users who will receive a notification once this assignment is marked complete, approved, or rejected.
  11. From the Select assignment class drop-down menu, select the assignment class for the separate assignment.
  12. In the Title field, enter a title for the assignment and, in the Assignment description field, enter an optional description for the assignment.
    By clicking the Add Placeholder... button, you can add placeholders for metadata properties in the Title and Assignment description fields.
  13. Optional: Check the Deadline check box and select the number of days to define a deadline for the separate assignment.
  14. Click OK to close the Create Separate Assignment dialog.
  15. Click OK to close the State Properties dialog.
  16. Click Save to save your changes.
The separate assignment is added to the workflow state. When an assignment with the aforementioned workflow is moved to the aforementioned state, the separate assignment is created and added as a linked assignment under the primary assignment.