Value List Contents (Individual Values)

You can create new items for the value list as well as new subitems for internally hierarchical values. You can also define hierarchical relationships between value list items (see Defining a Hierarchical Relationship Between Value Lists). Additionally, you can set value-specific permissions as well as default permissions for objects that use the item.

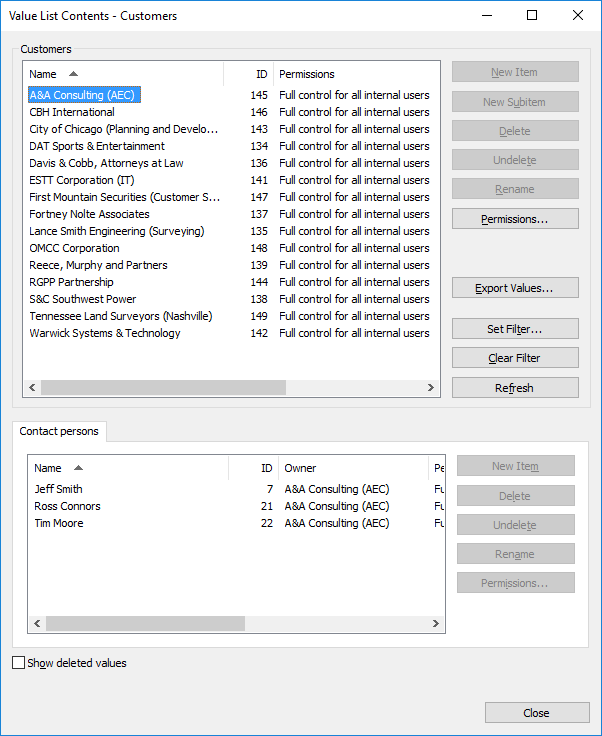
The "Contact persons" value list used as a sublist for the "Customers" value list.

Permissions

Via Permissions, you can specify the users who may see this value list item. This way, you can make a value list value to be visible to a specific target group only.

Automatic permissions

The actual final object receives automatic permissions when a value with automatic permissions specified is added for the object.

You can activate the automatic permissions by value, value list, object type, or class. For more information, see Automatic Permissions.

Versions older than 8.0: Default Permissions for Objects is a tab that enables you to set default permissions for any object that includes this item as a value. This makes it possible to implement permission settings that are based, for example, on the type of project selected.

Adding Values to a Value List

Steps

  1. Open M-Files Admin.
  2. In the left-side tree view, expand the desired connection to M-Files Server.
  3. In the left-side tree view, expand the document vault of your choice.
  4. Still in the left-side tree view, expand Metadata Structure (Flat View) and then select Value Lists.
    The Value Lists list is opened in the right pane.
  5. Right-click a value list to which you want to add individual values and select Contents... from the context menu.
    The Value List Contents dialog is opened.
  6. Click the New Item button.
    A new value titled New Item is added to the selected value list.
  7. Type in an appropriate name for the new value.
    You can rename existing values by selecting a value from the list and clicking the Rename button.
  8. Optional: Click Permissions... to specify the users who may see this value list item.
    For detailed instructions, see Permissions and Automatic Permissions.
  9. Optional: Click Change Icon... to change the icon of the value list item.
    In addition to being able to add icons for object types, you can add, change, and remove icons for value list items. This allows you to further increase the clarity of the M-Files user interface. Specific icons can be assigned to, for instance, workflow states and meeting types. Since workflow states can be changed directly with the shortcuts in the task area or from the metadata card, icons can be used to make the states visually more distinguishable. For detailed instructions, see Changing the Icon of a Value in a Value List.
  10. Optional: Repeat steps from 6 to 9 to add another value.
  11. Click Close when you are done.

Results

The new values are added to the selected value list.

Changing the Icon of a Value in a Value List

In addition to being able to add icons for object types, you can add, change, and remove icons for value list items. This allows you to further increase the clarity of the M-Files user interface.

Specific icons can be assigned to, for instance, workflow states and meeting types. Since workflow states can be changed directly with the shortcuts in the task area or from the metadata card, icons can be used to make the states visually more distinguishable.

Steps

  1. Open M-Files Admin.
  2. In the left-side tree view, expand the desired connection to M-Files Server.
  3. In the left-side tree view, expand the document vault of your choice.
  4. Still in the left-side tree view, expand Metadata Structure (Flat View) and then select Value Lists.
    The Value Lists list is opened in the right pane.
  5. Right-click a value list that you want to edit and select Contents... from the context menu.
    The Value List Contents dialog is opened.
  6. Select a value from the list and click the Change Icon... button.
    The Change Icon dialog is opened.
  7. Either:
    1. Select an icon from the list of icons.
      or
    2. Click Browse... to browse for a different icon file and then selet an icon from the list of icons.
  8. Click OK to change the icon and close the Change Icon dialog.
  9. Repeat the steps from 6 to 8 to change the icon for another value.
  10. Click Close when you are done to close the Value List Contents dialog.